Kaspersky Security for Microsoft Office 365
Configuring a Service Account manually
Configuring a Service Account manually
To configure a Service Account manually:
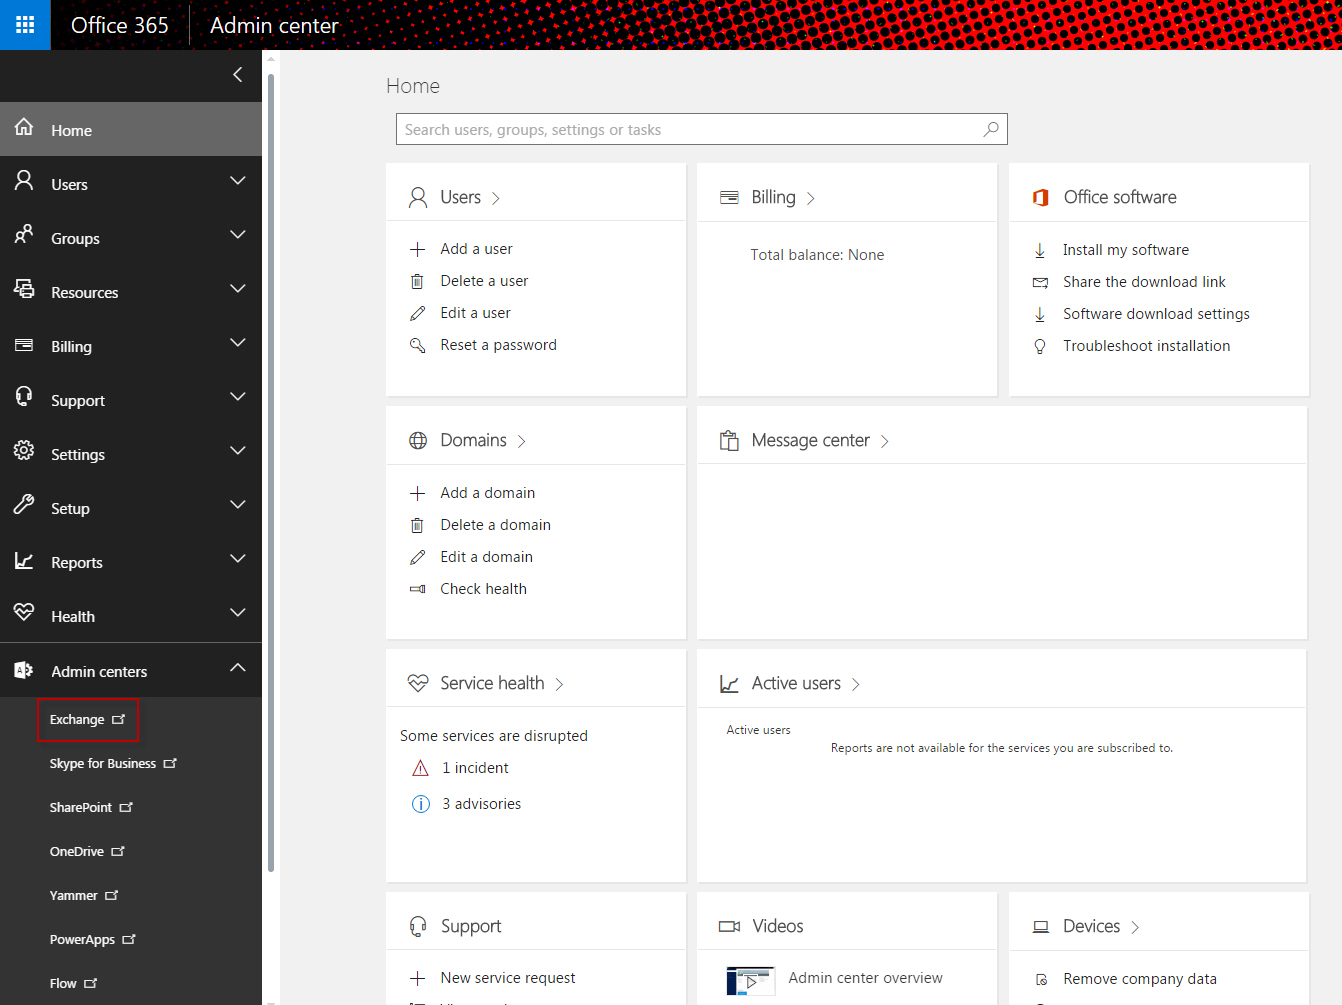
- Open Microsoft Office 365 Admin Center.
- Click the App icon in the upper-left corner and select Admin.

- In the left part of the window, select Users → Active users and click Add a user.
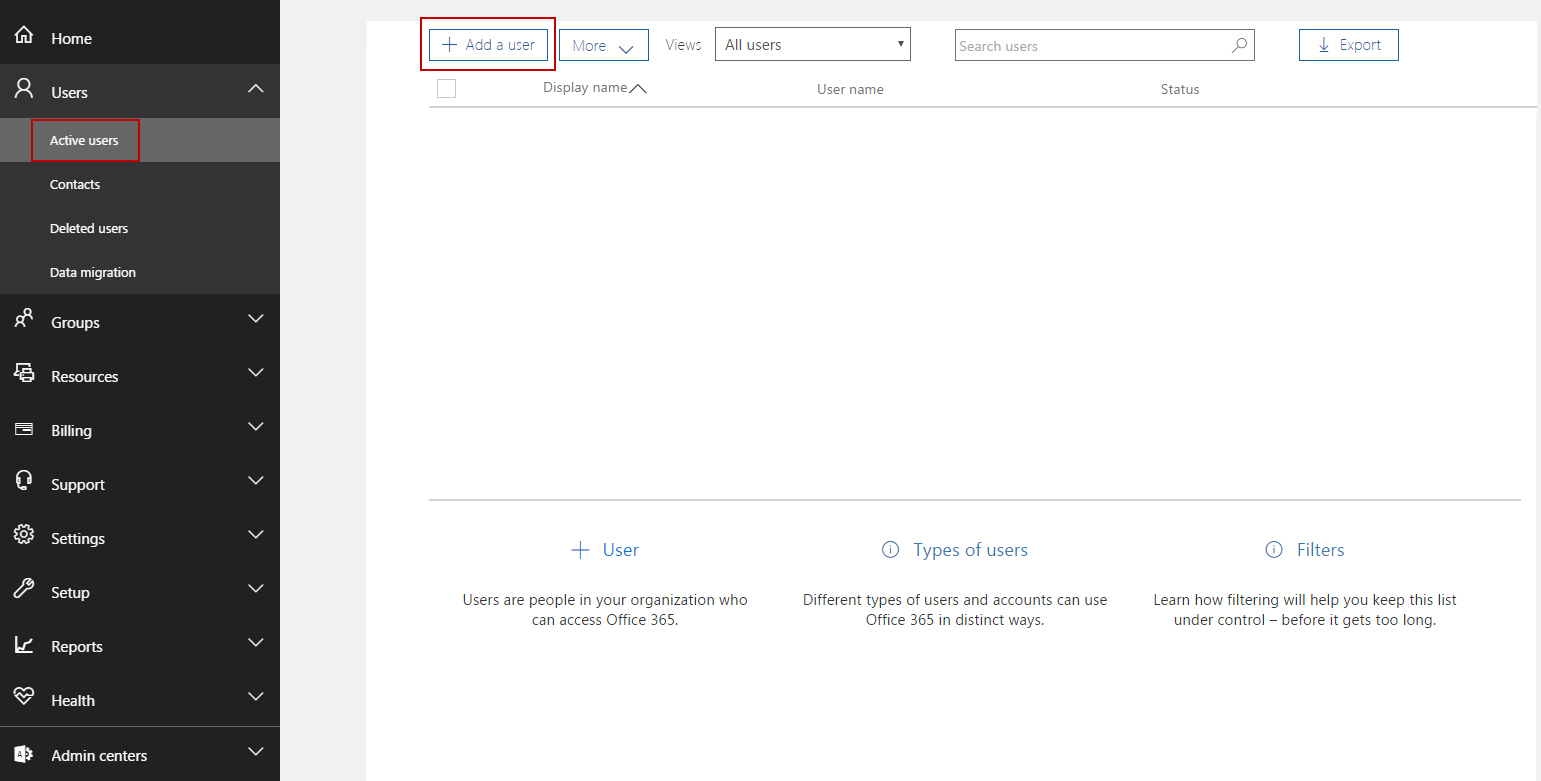
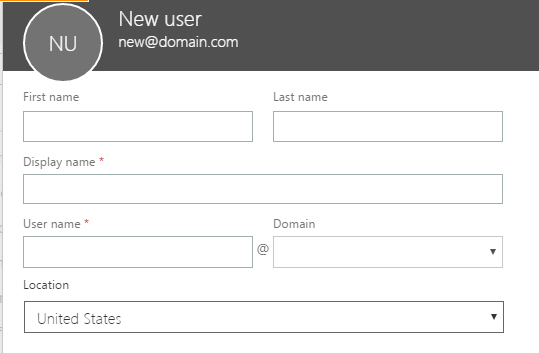
The window with user account details opens.
- Specify the user account information in the following entry fields: First name, Last name, User name.
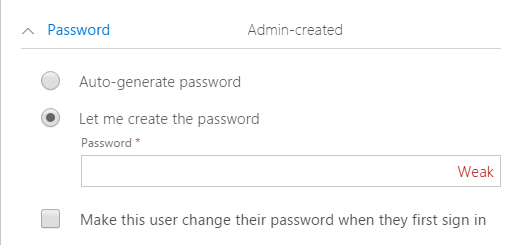
- Expand the Password section and choose Let me create the password if you want to use a custom password instead of an auto-generated one.
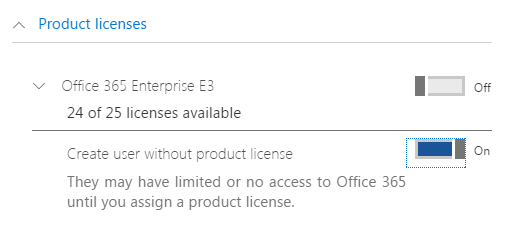
- Expand the Product licenses section and flip on the toggle switch in the Create user without product license section.
- Click Add.
Office 365 creates a new user. You can review the specified details and close the window.
To assign necessary roles to the newly created user account:
- In the left part of the window, select Admin centers → Exchange.
- Select the Permissions section.
- Click the + button.
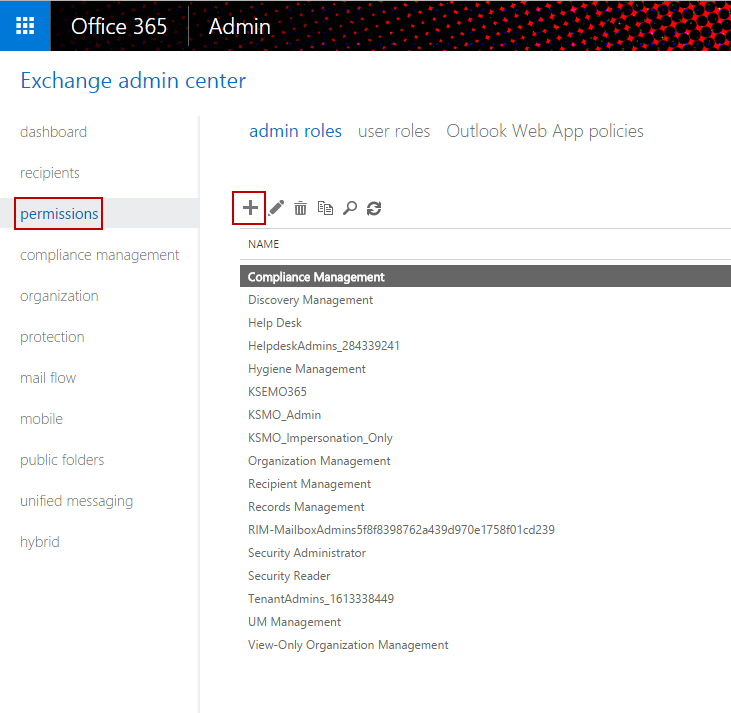
The New role group window opens.
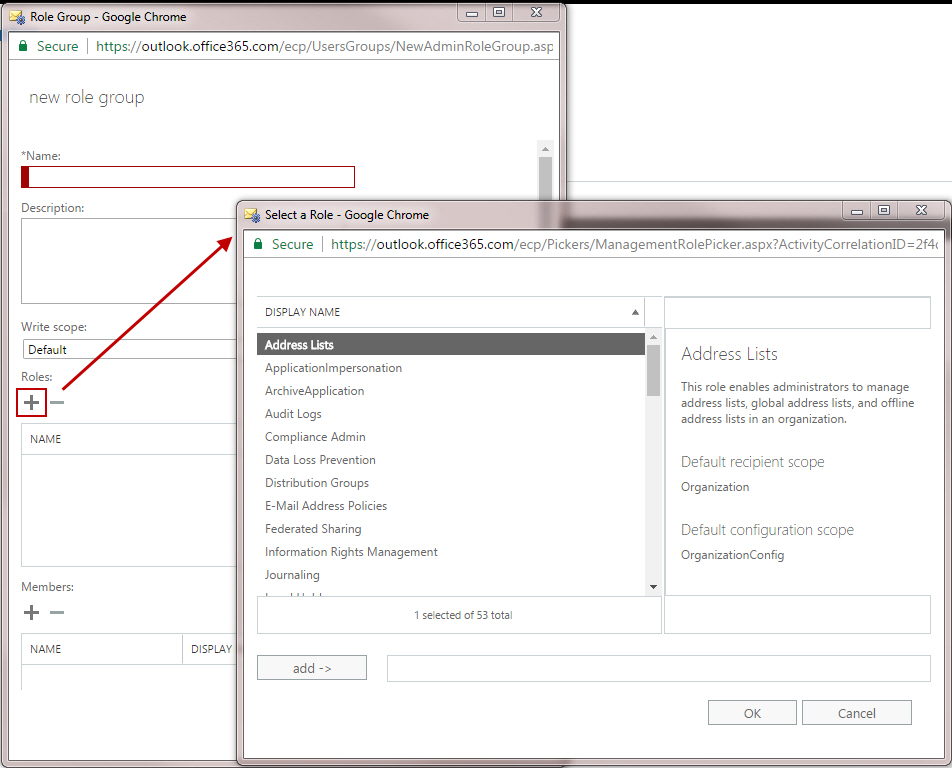
- In the Name field, type any name for the role group.
- In the Roles section, click the + button, and in the drop-down list select the ApplicationImpersonation and Mailbox Search roles. If you want to use the application to also manage the Exchange Online quarantined items, select the Security Admin role as well.
- In the Members section, click the + button and select the newly created user in the drop-down list.
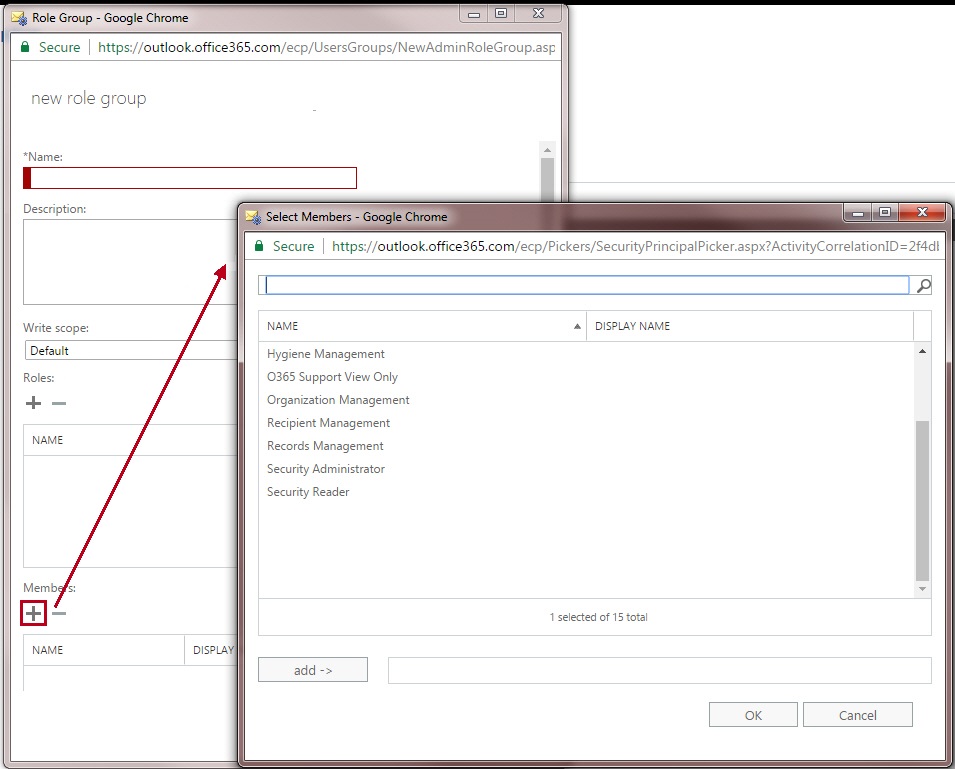
- Click Save.
Office 365 will update the Exchange Online organization settings. Once the Service Account has been configured, specify its credentials to connect the application to Office 365.
Article ID: 143134, Last review: Apr 2, 2018